Groups (FREE ALL)
In GitLab, you use groups to manage one or more related projects at the same time.
You can use groups to manage permissions for your projects. If someone has access to the group, they get access to all the projects in the group.
You can also view all of the issues and merge requests for the projects in the group, and view analytics that show the group's activity.
You can use groups to communicate with all of the members of the group at once.
For larger organizations, you can also create subgroups.
For more information about creating and managing your groups, see Manage groups.
NOTE: For self-managed customers it could be beneficial to create one single top-level group, so you can see an overview of your entire organization. For more information about efforts to create an organization view of all groups, see epic 9266. A single top-level group provides insights in your entire organization via a complete Security Dashboard and Center, Vulnerability and Compliance center, and Value stream analytics.
Group visibility
Like projects, a group can be configured to limit the visibility of it to:
- Anonymous users.
- All authenticated users.
- Only explicit group members.
The restriction for visibility levels on the application setting level also applies to groups. If set to internal, the explore page is empty for anonymous users. The group page has a visibility level icon.
Administrator users cannot create a subgroup or project with a higher visibility level than that of the immediate parent group.
View groups
To explore all public groups:
- On the left sidebar, select Search or go to.
- Select View all my groups.
- At the top right, select Explore groups.
To view groups where you have a direct or indirect membership:
- On the left sidebar, select Search or go to.
- Select View all my groups.
This page shows groups that you are a member of:
- Through membership of a subgroup's parent group.
- Through direct or inherited membership of a project in the group or subgroup.
View group activity
To view the activity of a project:
-
On the left sidebar, select Search or go to and find your group.
-
Select Manage > Activity.
-
Optional. To filter activity by contribution type, select a tab:
- All: All contributions by group members in the group and group's projects.
- Push events: Push events in the group's projects.
- Merge events: Accepted merge requests in the group's projects.
- Issue events: Issues opened and closed in the group's projects.
- Epic events: Epics opened and closed in the group.
- Comments: Comments posted by group members in the group's projects.
- Wiki: Updates to wiki pages in the group.
- Designs: Designs added, updated, and removed in the group's projects.
- Team: Group members who joined and left the group's projects.
Create a group
To create a group:
- On the left sidebar, at the top, select Create new ({plus}) and New group.
- Select Create group.
- Enter a name for the group in Group name. For a list of words that cannot be used as group names, see reserved names.
- Enter a path for the group in Group URL, which is used for the namespace.
- Choose the visibility level.
- Personalize your GitLab experience by answering the following questions:
- What is your role?
- Who is using this group?
- What are you using this group for?
- Invite GitLab members or other users to join the group.
For details about groups, watch GitLab Namespaces (users, groups and subgroups).
Remove a group
Enabled delayed deletion by default and removed the option to delete immediately on GitLab.com and on self-managed in GitLab 16.0.
To remove a group and its contents:
- On the left sidebar, select Search or go to and find your group.
- On the left sidebar, select Settings > General.
- Expand the Advanced section.
- In the Remove group section, select Remove group.
- Type the group name.
- Select Confirm.
A group can also be removed from the groups dashboard:
- On the left sidebar, select Search or go to.
- Select View all my groups.
- Select ({ellipsis_v}) for the group you want to delete.
- Select Delete.
- In the Remove group section, select Remove group.
- Type the group name.
- Select Confirm.
This action removes the group. It also adds a background job to delete all projects in the group.
In GitLab 12.8 and later, on GitLab Premium and Ultimate, this action adds a background job to mark a group for deletion. By default, the job schedules the deletion seven days in the future. You can modify this retention period through the instance settings.
In GitLab 13.6 and later, if the user who sets up the deletion is removed from the group before the deletion happens, the job is cancelled, and the group is no longer scheduled for deletion.
Remove a group immediately (PREMIUM ALL)
- Introduced in GitLab 14.2.
- Enabled delayed deletion by default and removed the option to delete immediately on GitLab.com and on self-managed in GitLab 16.0.
If you don't want to wait, you can remove a group immediately.
Prerequisites:
- You must have the Owner role for a group.
- You have marked the group for deletion.
To immediately remove a group marked for deletion:
- On the left sidebar, select Search or go to and find your group.
- Select Settings > General.
- Expand Advanced.
- In the "Permanently remove group" section, select Remove group.
- Confirm the action when asked to.
Your group, its subgroups, projects, and all related resources, including issues and merge requests, are deleted.
Restore a group (PREMIUM ALL)
Introduced in GitLab 12.8.
To restore a group that is marked for deletion:
- On the left sidebar, select Search or go to and find your group.
- Select Settings > General.
- Expand the Advanced section.
- In the Restore group section, select Restore group.
Request access to a group
As a user, you can request to be a member of a group, if an administrator allows it.
- On the left sidebar, select Search or go to.
- Select View all my groups.
- At the top right side, select Explore groups.
- Search for the group by name.
- In the search results, select the name of the group.
- On the group page, under the group name, select Request Access.
As many as ten of the most-recently-active group owners receive an email with your request. Any group owner can approve or decline the request.
If you change your mind before your request is approved, select Withdraw Access Request.
View group members
To view a group's members:
- On the left sidebar, select Search or go to and find your group.
- Select Manage > Members.
A table displays the member's:
- Account name and username
- Source of their membership. For transparency, GitLab displays all membership sources of group members. Members who have multiple membership sources are displayed and counted as separate members. For example, if a member has been added to the group both directly and through inheritance, the member is displayed twice in the Members table, with different sources, and is counted as two individual members of the group.
- Max role in the group
- Expiration date of their group membership
- Activity related to their account
NOTE: The display of group members' Source might be inconsistent. For more information, see issue 23020.
Filter and sort members in a group
- Introduced in GitLab 12.6.
- Improved in GitLab 13.7.
- Feature flag removed in GitLab 13.8.
To find members in a group, you can sort, filter, or search.
Filter a group
Filter a group to find members. By default, all members in the group and subgroups are displayed.
In lists of group members, entries can display the following badges:
- SAML, to indicate the member has a SAML account connected to them.
- Enterprise, to indicate that the member of the top-level group is an enterprise user.
- On the left sidebar, select Search or go to and find your group.
- Select Manage > Members.
- Above the list of members, in the Filter members box, enter filter criteria.
- To view members in the group only, select Membership = Direct.
- To view members of the group and its subgroups, select Membership = Inherited.
- To view members with two-factor authentication enabled or disabled, select 2FA = Enabled or Disabled.
- To view members of the top-level group who are enterprise users, select Enterprise = true.
Search a group
You can search for members by name, username, or public email.
- On the left sidebar, select Search or go to and find your group.
- Select Manage > Members.
- Above the list of members, in the Filter members box, enter search criteria.
- To the right of the Filter members box, select the magnifying glass ({search}).
Sort members in a group
You can sort members by Account, Access granted, Max role, or Last sign-in.
- On the left sidebar, select Search or go to and find your group.
- Select Manage > Members.
- Above the list of members, in the upper-right corner, from the Account list, select the criteria to filter by.
- To switch the sort between ascending and descending, to the right of the Account list, select the arrow ({sort-lowest} or {sort-highest}).
Add users to a group
Expiring access email notification introduced in GitLab 16.2.
You can give a user access to all projects in a group.
Prerequisite:
- You must have the Owner role.
- On the left sidebar, select Search or go to and find your group.
- Select Manage > Members.
- Select Invite members.
- Fill in the fields.
- The role applies to all projects in the group. For more information, see permissions.
- Optional. Select an Access expiration date. From that date onward, the user can no longer access the project.
- Select Invite.
If you selected an access expiration date, the group member gets an email notification seven days before their access expires.
Members that are not automatically added are displayed on the Invited tab. Users can be on this tab because they:
- Have not yet accepted the invitation.
- Are waiting for approval from an administrator.
- Exceed the group user cap.
Remove a member from the group
Prerequisites:
- You must have the Owner role.
- The member must have direct membership in the group. If membership is inherited from a parent group, then the member can be removed from the parent group only.
To remove a member from a group:
- On the left sidebar, select Search or go to and find your group.
- Select Manage > Members.
- Next to the member you want to remove, select the vertical ellipsis ({ellipsis_v}).
- Select Remove member.
- Optional. On the Remove member confirmation box:
- To remove direct user membership from subgroups and projects, select the Also remove direct user membership from subgroups and projects checkbox.
- To unassign the user from linked issues and merge requests, select the Also unassign this user from linked issues and merge requests checkbox.
- Select Remove member.
Ensure removed users cannot invite themselves back
Malicious users with the Maintainer or Owner role could exploit a race condition that allows them to invite themselves back to a group or project that a GitLab administrator has removed them from.
To avoid this problem, GitLab administrators can ensure removed users cannot invite themselves back.
Add projects to a group
There are two different ways to add a new project to a group:
-
Select a group, and then select New project. You can then continue creating your project.
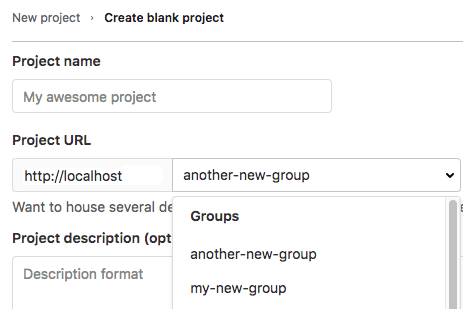
-
While you are creating a project, select a group from the dropdown list.

Specify who can add projects to a group
- Introduced in GitLab 10.5.
- Moved from GitLab Premium to GitLab Free in 11.10.
By default, users with:
- At least the Developer role can create projects under a group. This default can be changed.
- At least the Maintainer role can fork projects into a group. This default prevents users with the Developer role from forking projects that contain protected branches and cannot be changed.
To change the role that can create projects under a group:
- On the left sidebar, select Search or go to and find your group.
- Select Settings > General.
- Expand the Permissions and group features section.
- Select the desired option in the Roles allowed to create projects dropdown list.
- Select Save changes.
To change this setting globally, see Default project creation protection.